Maya Travel Uncategorized Mastering the Cost of Wall Paneling: Your Ultimate Guide

Mastering the Cost of Wall Paneling: Your Ultimate Guide


Mastering the Cost of Wall Paneling: Your Ultimate Guide

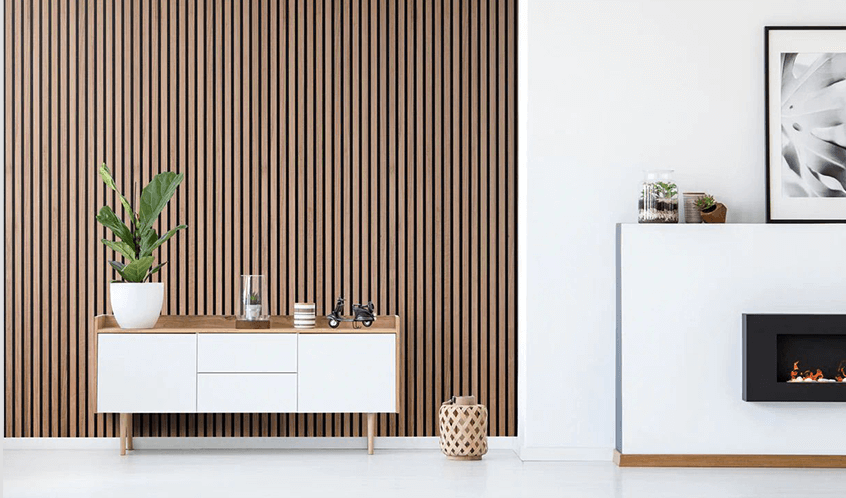
Wall paneling provides a distinct blend of design and usefulness, transforming plain walls into eye-catching focal pieces. Wall paneling is also a wonderful way to elevate your home’s interior while keeping

affordable materials

in mind. Whether you want to add cosy charm or modern elegance, knowing the cost of wall paneling may help you budget wisely and make informed decisions.

This comprehensive guide will walk you through the key factors influencing costs, tips to save money, and answers to common questions.

Breaking Down Wall Paneling Costs

The cost of wall paneling varies according to numerous factors. Understanding what causes these expenditures can help you plan your project more effectively.

Material Choices: The Foundation of Costs

Different paneling materials have varying pricing points, durability levels, and aesthetic appeal. Here’s a close look:

MDF and Plywood
These materials, which are both affordable and versatile, are ideal for painting or laminating. Prices vary from $1 to $3 per square foot.

Solid Wood
Opting for premium materials like solid wood can increase durability but also affect

wall paneling

significantly. Solid wood, which offers both luxury and durability, costs between $15 and $40 per square foot, depending on the type of wood.

PVC Panels
PVC panels are water-resistant and simple to clean; they cost between $5 and $10 per square foot, making them perfect for bathrooms and kitchens.

Stone or Brick Veneer
These panels are a premium alternative for rustic or industrial designs, costing $25 to $50 per square foot.

Installation Costs: DIY vs. Hiring a Pro

Labor charges can significantly impact the cost of wall paneling

DIY Installation
If you’re skilled, a DIY approach can save $5 to $10 per square foot. However, precision and the right tools are essential.

Professional Installation
Hiring professionals ensures flawless results. Expect to pay $5 to $10 per square foot for installation.

Wall Preparation

Preparation is essential for a flawless finish. If you need to repair or level your walls, budget $1 to $3 per square foot.

Additional Cost Factors

Other expenses to consider:

  • Custom Designs: Intricate patterns or shapes increase material and labor costs.
  • Finishings: Paint, stain, or sealant may add $2 to $5 per square foot.
  • Area Size: Larger spaces cost more but may benefit from bulk pricing.

Average Costs for Common Scenarios

Proper planning and smart choices can help you control

installation costs

while achieving stunning results. Here’s an estimate of the cost of wall paneling based on a 200-square-foot area:

Material Cost (Per Sq. Ft.) Installation Total Range
MDF or Plywood $1–$3 $5–$10 $1,200–$2,600
Solid Wood $15–$40 $5–$10 $4,000–$10,000
PVC $5–$10 $5–$10 $2,000–$4,000
Stone/Brick Veneer $25–$50 $5–$10 $6,000–$12,000

Creative Paneling Options to Enhance Your Space

The possibilities are endless when it comes to wall paneling. Here are some popular choices:

  • Shiplap: A clean, modern aesthetic that adds texture and depth.
  • Wainscoting: A classic look perfect for dining rooms and hallways.
  • Geometric Panels: Unique patterns to create a bold, contemporary style.
  • Beadboard: A charming, vintage vibe ideal for cozy spaces.

How to Save on the Cost of Wall Paneling

Renovation does not have to be pricey. Here are practical ideas for keeping your project on budget:

  • Shop Around: Compare prices from multiple suppliers and contractors.
  • Consider Alternatives: Faux materials mimic expensive options at a fraction of the price.
  • Focus on Accent Walls: Use premium materials sparingly to create a focal point.
  • DIY Prep Work: Handle wall repairs and priming yourself to cut labor costs.

FAQs About the Cost of Wall Paneling

1. How Much Does Wall Paneling Typically Cost?

The cost of wall paneling is determined by the materials used, the installation process, and the wall preparation. Expect to pay between $1,200 and $12,000.

2. Is Wall Paneling a Good Investment?

Yes, wall paneling improves the aesthetics of your property while also increasing its market value. High-quality materials, such as wood or stone, can leave a lasting impact.

3. Can I Install Wall Paneling Myself?

DIY installation is possible for straightforward designs and lightweight materials. However, professional installation is recommended for complex or heavy panels.

4. Are There Maintenance Requirements?

Maintenance depends on the material. Solid wood may need periodic sealing, while PVC and MDF require minimal upkeep.

5. What Is the Cheapest Wall Paneling Option?

MDF and plywood are the most affordable, starting at $1 per square foot.

Investing in wall paneling is an excellent way to enhance your home’s interior design while improving durability. By understanding the cost of wall paneling and exploring your options, you can achieve a stunning transformation that suits your budget.

Whether you choose modern shiplap, classic wainscoting, or luxurious stone veneer, wall paneling is a worthwhile upgrade for any space.

Related Post

How You Can Lease Office SpaceHow You Can Lease Office Space

Many businesses may need to try to look for commercial office space for rent at some point. There’s an alternative solution to searching through countless online listings in order to uncover commercial real estate for lease or commercial office space for lease in the area.,How To Find office space for rent Every company needs commercial property to work from so leasing an industrial Building is one thing that you’ll be more likely to have to do if you run your personal company or control one for someone else.

#1 Consider Getting The Aid Of A commercial agent that represents tenants

Ideally,it’s not necessary to rent office space more than every 3 to 5 years or so; the same with rent renewals. Renting or purchasing commercial real estate is completely distinctive from your typical real estate experience purchasing a house. Engage the services of your very own commercial broker; a certified office renter representative. These are commercial agents who focus on representing tenants,not landlords. A great renter representative will produce the leverage required at the beginning of the process so you’ve got strength in the negotiation to get the benefit the market at large has to provide. Landlord reps must have an intensive expertise of renter demographics,occupancy rates,leasing rates,and industry trends. They are adept at relationship building and must know how to include the needs of tenants,landlords,and leasing agents into agreed-upon deals.

#2 Determine Your Needs

It’s important to fully fully grasp your company’s present and future needs. Bear in mind most leases are 3-5 years long so it is essential that you do your best to organize and budget appropriately. During this assessment determine the ideal size,location,budget,timeline,and growth needs.

#3 Look for Space

In case you are looking for commercial space all on your very own then start searching online for commercial spaces for lease. Loopnet and 42floors are a good place to start. It could also be a good idea for you to drive around town and call for rent signs and talk to all of the property manager agents when they give back your phone calls. In case you are working with A commercial agent that represents tenants then they will do all of the time consuming work on your behalf of looking for and identifying the best spaces that meet your criteria. They will call all of the listing agents,collect floor plans,pictures,etc. and present you the best options. Next they’re going to schedule tours of all of the commercial real estate that made the shortlist and tour together with you giving you impartial feedback and inside info regarding each property.

#4 Send Recommendations To Landlords

Now it is time to send out proposals to the property manager agents. By now you have shrunken it down to the spaces that satisfy your ideal dimensions,place,and budget. Don’t be tempted to place all your eggs in one basket,specifically in a hot market. Ideally you have to send out out multiple proposals to be able to enable the landlords to compete for your tenancy. It would likewise give you back ups in case one space gets rented to another tenant. In case you are dealing with a commercial agent that represents tenants then they are going to write proposals for you,or else if you are doing everything on your own then you’ll have to write the proposals yourself.

#5 Evaluate The Recommendations

The best real estate proposals have a single common trait – they are seriously customized to match you,the client whose company they want to win. Property owners would work out bargain conditions and then put together rent proposals for potential tenants with the tenants immediately or their agents or reps if appointed. In case you take on a commercial agent that represents tenants they are going to help put together an evaluation of the property manager proposals that you get back. The aim is to accomplish a assessment of the different rent conditions and you would have to structure this evaluation in a method that makes them simple to evaluate. You would have to work with your commercial agent that represents tenants if you appointed one,along with your lawful counsel to work out and enhance company and lawful conditions and put together proposals and counter-proposals. Be prepared for some effort at this phase as the rent would likely be a lengthy one and not very easily altered when initially agreed.

#6 Work Out The Bargain

By now you need to have all the information you have to intelligently work out basic bargain points as well as the commercial lease contract. In order to make sure that you end up getting the smallest rent rate and best conditions possible,you or your broker along with your lawyer would work out with the property manager and the landlord’s lawyer. The landlord’s lawyer would write a rent for you to approve,once everyone agrees on the basic terms and conditions.

#7 Build Out And Move In

Once the rent is authorized now you can start the procedure for building out the space as needed. If you have a commercial agent that represents tenants they are going to be able to advise vendors such as architects,building contractors,phone and data cablers,etc.

Tax Relief in FloridaTax Relief in Florida

Florida lawmakers recently passed HB 7071,the largest tax relief bill in the state’s history. The legislation includes tax breaks for everything from diapers and sports gear to pet food and school supplies. The measure is estimated to save Floridians an additional $190 million in taxes over the next two years. It also expands 10 sales tax holidays and is expected to help families across Florida lower their tax burden.

-

Tax relief in Florida is available for hurricane victims who have suffered property losses. The Federal Emergency Management Agency (FEMA) has declared the state a disaster and has extended deadlines for those who are unable to pay their taxes. This means that Florida residents who had to endure power outages and loss of business because of Hurricane Ian may qualify for tax breaks.

-

The tax break also applies to military members. The Florida Constitution gives property tax exemptions to deployed service members,widows and widowers,and the blind and disabled. Last year,Florida expanded the tax exemption to include unclassified military operations. These benefits will help Florida residents afford their homes,cars,and other expenses.

-

Another Florida tax break program is the Florida Internship Tax Credit Program,which grants businesses a tax credit of up to $10,000 for each student intern they hire. The program is contingent on voter approval of a constitutional amendment in November 2022.

Why Is My Reverse Osmosis Tank Not Filling Up?Why Is My Reverse Osmosis Tank Not Filling Up?

It can be frustrating when your RO system is on the fritz, like when the reverse osmosis tank isn’t filling up. Not only does that prevent your water from being filtered, it can potentially damage the system, becoming a costly problem. Even if the tank is working fine right now, it’s important to understand how to correct issues before they happen. 

If your RO tank isn’t filling, let’s take a look at potential reasons why and how to correct them. 

7 Reasons Why Your Reverse Osmosis Tank Isn’t Filling Up & How to Fix Them

Possible Issue RO Part Affected Action to Confirm

#1 Low Household Water Pressure

None Check household water pressure (see below)

#2 Low RO Tank Pressure

RO Tank Air Valve Measure tank pressure with a tire gauge to the air valve under a blue cap. It must be 5-7 psi.

#3 Broken Tank Bladder

RO Tank Air Bladder If water leaks out of the air valve, the tank bladder may be compromised.

#4 Clogged RO Membrane in Need of Replacing

RO Membrane Check its next Replacement Date. If possible, compare its feed pressure against its norm.

#5 Clogged RO Filters in Need of Replacing

RO Carbon Filters Check its next Replacement Date. If possible, compare its feed pressure against its norm.

#6 Improper Water Feed Connection

Water Feed Lines and Connectors Check for kinks and hook-up connections.

#7 Improper Water Drain Connection

Water Drain Tubes and Connectors Check for kinks and hook-up connections.

Low House Water Pressure

One of the most common reasons for a tank not filling is the house’s water pressure itself. Ideally, for an RO system to work, the water pressure must be 60 psi, but a range of 40 to 80 is acceptable too. When the pressure is too low, the water can’t push through the RO membranes, preventing the tank from filling. If the pressure is low at all the faucets in the house, it is likely a temporary issue with the local water company, in which case you should give them a call.

Low RO Tank Pressure

If all the faucets in the house are working normally then the pressure in the tank may be the issue. The tank should have a pressure of 7 to 8 psi without any water in it; to confirm or see what the pressure is, locate the valve (typically covered by a blue plastic cap) on the side of the tank near the bottom. After removing all the water from the tank, use a pressure gauge to see what it is. If low, add air with a pump until reaching 7 or 8 psi, and be sure to only add a small amount of air at a time or risk rupturing the air bladder.

Broken Tank Bladder

If you only get one cup of water from the RO faucet (at normal water pressure) and then it quickly turns to a trickle or small stream, it’s usually a sign the air bladder in the storage tank has ruptured. Unfortunately, the only solution to this is to replace the storage tank itself.

Clogged RO Membrane

Like other water filtering systems, the components that do the filtering need regular changes. This is a common reason for the tank not filling up, the membranes being clogged, preventing water from passing through them and stopping the tank from filling. These membranes are fragile and can easily become clogged if not switched out regularly, generally every 24 months depending on usage and water quality. To solve this, have a technician come to replace the membranes with new ones.

Clogged Reverse Osmosis System Filters

A reverse osmosis system filters water in two ways, through membranes and cartridges (filters). If the membranes are new or recently replaced, a clogged filter may be the reason the tank isn’t filling. The carbon blocks (filters) should be changed every six months to once a year depending on water quality and usage. If the water tastes like chlorine or different than usual, this may be the reason for the tank not filling and only requiring a new cartridge.

Improper Water Feed Connection

Another reason for the tank not filling is with the water feed connection itself, which can happen in two ways: there is a kink in the water line or it was improperly installed. Look at pictures of the installation that show the proper feed connection to ensure it is hooked up correctly and double-check that the water supply line valve is in the fully open position.

Improper Water Drain Connection

The drain saddle, where the wastewater carries contaminants away, can sometimes cause the reverse osmosis tank to not fill. To see if this is the cause, first check if it is installed correctly by checking the installation pictures. Another related error may be the ASO valve not shutting off, which can be tested by turning the tank valve off to see if the ASO stops flowing to the drain, which can take a few minutes to see.

If the ASO is found to be the culprit, there are a few reasons for this:

  • The flow restrictor is missing or failed, signaled by a large amount of water flowing to the drain and a lot of noise.
  • The tank isn’t filling.
  • The ASO valve is stuck in a closed position. If this is the case, then completely disconnect the valve to make sure all pressure is off the assembly and replace it.
  • The check valve may be bleeding pressure, which can be tested with a full tank of water while the tank valve is open. First, turn off the water supply and if it is still flowing to the drain, then the check valve is leaking pressure and needs to be replaced. It’s an uncommon error, but is Worth checking. 

Ensuring Your Reverse Osmosis Unit Functions Correctly

As with any machine, errors can occur, and it’s important to know what to look for and to regularly check the RO system. Some of these issues do require Professional assistance, especially if troubleshooting hasn’t helped or solved the issue outright. 

We at H20 Solutions are dedicated to empowering individuals who want water their way, delivering safeguards to improve the home’s water supply and properly maintaining the filtering system with the right tools. If you have RO system problems, we invite you to connect with our experts and explore our selection of tools to help get your water back to the quality you deserve. Click below for more information.
    

H2O Solutions | Reverse Osmosis

-